Thursday, July 12, 2012

Paint to the Rescue!

As is typical of New York City apartments, the distance between the bed and the closet is small. Like ubber small. We have a tiny dresser there, that is about as old as Dan but never fit with our style. I have looked and looked for an inexpensive replacement but of course because that area is so tiny, I would have to custom build in order to get something new. I am pretty ok at making a book shelf but not quite handy enough to put together a dresser just yet. Hence, the paint.
Here is the original, it's cute and made of pine but we have mostly white furniture and it just needed a little love.
I sanded it down with super fine sand paper, one hundred grade just to open up the wood so it would really suck up all the primer.
Then I primed with Valspar oil based primer. It was my first time using Valspar, usually a Benjamin Moore kind of girl but this worked beautifully. I also found the foam brush is a better choice for all the nooks and crannies. I started with a standard bristle brush but switched shortly after.

After I let that dry, I moved on to the top coat which was also Valspar standard flat white. I painted the nob but was never a big fan of it. After talking with my pops, he suggested he look in "inventory" as he likes to call it. My parents own a very old home in the country which has random parts from the late Nineteenth century.  He is constantly on the hunt for orginial replacements or good enough fakes to have on hand just in case the door hinge breaks. He came up with a small white porcelian nob which fits perfectly.
 I added the canvas bins from Bed, Bath & Beyond, so the small stuff can be stored out of the way. All worked out and well worth the time.

Monday, July 2, 2012

Texaline BBQ and a sprinkle of salt

Mighty Quinn is an art form. It is precious, it is amazing, it is beyond what words can describe. Surprisinlgy, it is barbeque. I went to visit this particular stand at Smorgasburg a few weekends ago upon suggestion of many friends. The entire menu consists of two items, in sizes either small or large, a choice of pulled pork or brisket sandwich on a brioche roll.

We sample both as one does, when one has a small obsession with charred meat. The owner, smoker extradonaire, Hugh Mangum practices his own kind of bbq, something he refers to as "Texaline" a beautiful hyrid of Texas orginal and Eastern North Carolina, harkening his father's heritage and collaborating with his wife's home base. Word has it, Hugh will forgo sleep for 20 hours a day, three days in a row to smoke his meats.  He uses a sort of maschoistic twenty minute schedule for his sleep cycle to perfected his meat, maintaining a close watch on his fire to ensure the temperature stays at the right degree. 


Well, Hugh, it's worth it. The meat is everything you could imagine after someone tends to a fire for over seventy-two hours, forgoing personal comfort and perhaps a little sanity.  It falls apart, melts away in your mouth, with the most wonderful combination of fat and muscle. It leaves a taste of smoke, grilling, summer and sun.  The sandwich is nestled perfectly in a vintage paper french frie basket layering brioche first, bbq either pork or brisket, healthy dose of his secret bbq sauce and then covered with whatever fixings you choose. I asked for his recommendation on toppings which consisted of lightly pickled cucumbers, onions and red hot peppers. The most ingenious move is he uses a generous pinch of large sea salt over the toppings. One would think the bbq is salty by nature and perhaps this is overkill but it adds level of crisp, one that you may have not noticed without, but are so glad is there.

I am still dreaming of the brisket but my boyfriend was all about the pork. Both were equally delicious and well worth the twenty minute sleep cycle of pain.  Hugh Mangum, you are my hero.

Sunday, June 24, 2012

Kale Chips

Oh my goodness, I am loving my CSA. Usually, I don't give kale much attention, it's a hearty green that can be tossed in with whatever else is in the ole fridge when dinner is a scramble. I tend to use it in egg dishes like a ninja style quiche or saute with some garlic as a side dish.
But, I had a moment in my life so I thought I would try my hand at Kale Chips. I made them once years ago which sort of led to a teeny tiny fire situation in my kitchen, perhaps too much heat, too close to the broiler? Anyway, I did a little research and found some ingenius solution to ensure no fires and delicious chips.
1) Lower the heat the better
2) Evenly sized pieces of Kale
3) Close Beady eye on process


First thing to do is wash and dry your stalks of kale. While drying, I wrap my baking sheet with tin foil and preheat the oven to two hundred fifty degrees. I then rip the leaves off the stem, the stem is very woody and tends to be bitter.


I pour a generous amount of good quality olive oil on the baking sheet, throw the kale on and slowly roll over and over until each piece is comfortably covered in oil.

  Then sprinkle whatever seasoning sounds good to you. Salt and pepper is a great combo, or salt and paprika, or salt and chili powder. I used a little old bay spice this time with a little chili powder and it was amazing.

Once they are in the oven, set a timer for eight minutes but check them after four to see how they are crisping. They should change to a lovely golden brown on the edges and become slightly more green. You can give them a little shake and pop them back in to complete the time. The timing can be tricky, it does depend on how hot your oven is, so I would just watch the first batch to check your timing.
 Enjoy!

Wednesday, June 20, 2012

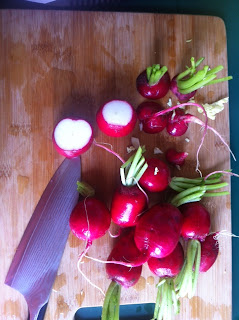
Radishes again!

I joined a CSA. I was a member of one downtown a few years ago and had looked for one up here, finally finding Cream of the Crop, formally Chubby Bunny. CSA stands for community supported agriculture which essentially means you buy a share in a farm and are delivered fresh vegetables. 
I had my first pick up yesterday and got kale, purple chives, garlic, romaine lettuce, butter lettuce, kohlrabi, savoy cabbage and radishes! Lots of them! 
The best part of a CSA is the Christmas like quality. Each week, you get a new batch of whatever is in season. I love trying new recipes and figuring out how to handle odd things like savoy cabbage and radishes. 

 I did a quick google and since its about a hundred degrees here in New York came up with a slaw. I found something by Martha Stewart, I know, who knew? I adapted a couple things based on what I had in the pantry and added a little honey, dropped the raisins because I don't care for them and added more radish to the recipe.
I always adapt recipes to my preference. I tend to work slowly to see how it tastes before following through to the next step. It worked out beautifully and now is chilling in the fridge.

Ingredients

1/4 cup white-wine vinegar 2 tablespoons Dijon mustard, preferably whole grain 2 tablespoons sugar 1/2 small head napa cabbage (about 12 ounces), cored and shredded (6 cups) 4 or 5 radishes, thinly sliced and cut into matchsticks *1/2 cup golden raisins (dropped this)
*added 2 tablespoons of honey 1 tablespoon thinly sliced fresh chives Coarse salt and freshly ground pepper
 

Directions
Whisk together vinegar, mustard, and sugar. Toss together cabbage, radishes, golden raisins, and chives. Drizzle dressing over salad. Season with salt and pepper.
 

Tuesday, June 12, 2012

I went to the affordable art fair here in NYC a few weeks ago and found it amazing but really not affordable. There were unbelievable prints, pressed pieces, oils on canvas, photographs even sculpture. But alas, the name "affordable" really means anything under $10,000.00, which is not something I have laying around for apartment enhancement.
A few weeks later, I came across this Mark Rothko poster and decided to purchase it. I grew up in a house that resembles more of an art gallery than a house, literally the walls are covered in oil paintings, prints, a few large photographs and even a selection of Disney cartoons. My father has a tendency to treat it like a gallery too, moving the pieces around the house, curating so to speak, to create a new feel or vignette. So I found this poster. I never have been a poster kind of girl, I wasn't into tacking posters of movies like the Princess Bride or Clueless on my wall. Something about the unfinished edge bugged me.

But not this Rothko!
It has this delicious stripe of red and enormous blocks of yellow and orange which is skirted with a green rim. Who knew it could be so effective? My living room has punches of red, incorporated to balance the beige, white and brown furniture. Although, framing a poster can be an expensive ordeal, I found a good quality shop on Columbus who offered to cut, frame and include a matte for under $100.00.  
The other wall to the right is a bit naked but I am waiting and keep my eyeballs peeled for another interesting option.

This shows more of the red, two magazine organizers I found at the Crate & Barrel outlet. None of the reds in my apartment match, they are layered tones. I don't believe objects need to match, as long as there is a congruent story line. I actually do wear different shades of black or even black and brown, god forbid. For example, a tone on tone of the same color can be just as pleasing.

This living room shows the common story line of color with the taupe backdrop, warming to a lavender pillow, grey pillow and white couch.

Or in this image, the pillows are shades of blue and build off the wall as well as the shades and gorgeous piece of art. I think this is inspiration for my next bedroom!


Monday, June 11, 2012

Sugary Nesting

I have been in a nesting phase lately. Just sort of shuffling things around my apartment, moving and replacing things and just reorganizing. We don't live in the largest of space so I try to be as efficient as possible and limit my shopping for home stuff. That being said, I went to Home Goods last week for a new shower curtain and found a gorgeous body lotion by Tocca, for a fraction of the price and in a gorgeous box. I had been storing my hair ties, bobby pins etc in this small glass jar but was able to use the box instead. It all looks very girly but cute.

So then I had this lovely glass jar that I wanted to keep but don't really want hanging around without a purpose. So I made a sugar scrub!
I am a big fan of any scrub, not only does it make your skin feel and look amazing but it also is good for circulation and can help release toxins. To get really traditional you should use a scrub on a dry skin but sometimes, its just enough to take a luxurious shower and feel even more gorgeous after.
So I started poking around in my pantry and saw a jar of sugar. I almost never use sugar as I don't bake and don't take it in coffee or tea so figured it was better served elsewhere. I also found a bottle of grape seed oil that I had purchased on whim after reading it was better for you than olive oil. That may very well be true, but it doesn't taste much better so I had stopped using it for cooking. I also saw some vanilla extract, again purchased for a baking need but rarely used. I used to use a scrub from Origin's which is lavender vanilla scented and loved it so decide to recreate at home. Off I went in search of Lavender oil essence, which I found a health food store but is also at Whole Foods and probably Trader Joe's if you don't have a health food store you like.  

Typically for a scrub, it's two parts sugar to one part oil and scent to your own taste. I decided to measure the sugar in the jar before doctoring it up so I didn't make too much. Then I started mixing the lavender oil and vanilla extract in equal portions until I got a scent I liked.
 I added the grape seed oil slowly and mixed in the sugar next.
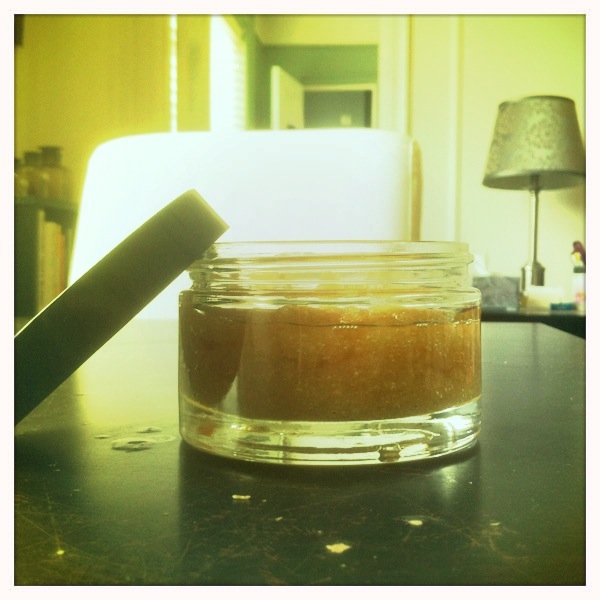
After a good toss around the bowl, I dumped into the jar and voila, final product!

It's pretty fantastic and cost less than ten dollars all in plus I have all the ingredients for another batch. The only tricky part is it made my tub a little slippery so I recommend rinsing your tub pretty seriously after using it. 
Some alternative scent combinations could be
 lemon essence, sugar, grape seed oil
 Sage essence, salt and olive oil
 Chamomile and lavender essence with sugar and grape seed
Enjoy!


Friday, June 8, 2012

Tornado style poaching? Eggs? Yes, please.


My little sister, who really isn't little anymore but always will be littler to me taught me how to poach an egg this past weekend. She very patiently showed me how she poaches an egg, something I have always wanted to learn but found intimidating. She said something very simple to me while coaching "Kirst, it's just an egg, we have a whole other eleven to go, if this one doesn't work out". 
Duh. 

Essentially, you put a deep sauce pot on to boil with lots of water and wait for a steady simmer.  The bubbles should look like a good quality champagne, or seltzer, a steady little popping or fizz. Meanwhile, crack you egg into a cup.

Once the water is just right, take a slotted spoon with a long handle and begin to create a tornado in the pot, by circling the spoon. Once there is enough force creating a funnel, gently pour the egg in. Natural physics will take over, the egg will roll a little on itself and in about three minutes, it's done.  Pull it out with the slotted spoon and place on a paper towel, blot any water and then serve.

I was so thrilled with the is accomplishment, I have had 3 poached eggs since Saturday.  I made this delicious salad with zucchini, bacon, feta, sauteed mushrooms, romaine and a poached egg.
Ingredients:
1 poached egg
2 strips cooked bacon, crumbled
1 cup romaine lettuce chopped
1/2 cup zucchini julienned
1/2 cup sauteed mushrooms
2 tablespoons crumbled feta
Directions:
Layer salad with romaine on the bottom of plate, followed by zucchini, mushrooms, bacon, feta. Dress salad with a white balsamic vinaigrette and then place egg on top. Enjoy!